1. Development environments (IDE)
For writing programs, it is common to use development environments. The process of writing a program is the following:
-
the source code is entered using the keyboard
-
then follows the compiling of the source code
-
the output is an executable i.e. a program written in the language of the computer
-
Integrated development environment is mix of multiple programs, that are combined in order to simplify the development process:
-
text editor
-
compiler
-
debugger
-
external library integration
-
linker
1.1. Text editor
-
Program for inserting and editing the text of the source code
-
Enables saving and loading already written source code files for editing
-
Syntax highlighting
-
Example of good text editors for writing source code are:
| Do not use Windows Notepad |
1.2. Compiler
-
Transforms (translates) the source code from the programming language (high level) to machine language
-
Two types of code translators:
-
Interpreters
-
Compilers
-
Interpreter is a translator of source code which translates each command separately, checks for errors and executes, and goes to the next command.
Compiler is a translator which is processing the whole program, checks for errors, and creates the executable program.
The resulted executable can be executed
1.3. Debugger
-
Compilers and interpreters are detecting the (syntax) errors of the source code as a result from incorrect usage of the programming language
-
Other type of errors are logical errors
-
The program doesn’t execute as intended
-
Very difficult to discover
-
-
Debugger is a program that helps discovering logical errors
-
Enables execution step by step
-
1.4. Integration with external libraries
-
Integration and usage of already created and correct modules, also called functions
-
This type of organization has many advantages
-
Reuse of standard functions
-
-
Example libraries
-
Standard input/output
-
Mathematical operations
-
1.5. Linker
-
Sometimes the program is to large to be written in one file
-
different parts can be written by different programmers
-
some parts from one program can be used in some other program
-
Separately compiled parts must be united in on full executable with the help of the linker
-
Another role is to link standard functions with the executable
-
1.6. Integrated Development Environment - IDE
All these elements of the development environment are integrated in IDE. Code::Blocks is an example of IDE that can be used in this course.
1.7. Installing Code::Blocks
How to find and install Code::Blocks?
Code::Blocks is free software and can be find
In the central part of the page, there are three links:
-
Download the binary release,
-
Download the source code and
-
Retrieve source code from SVN
The first link is recommended for most simple installation
Download the binary release. Windows users should download
the version codeblocks-16.01mingw-setup.exe.
|
1.8. Code::Blocks – main window
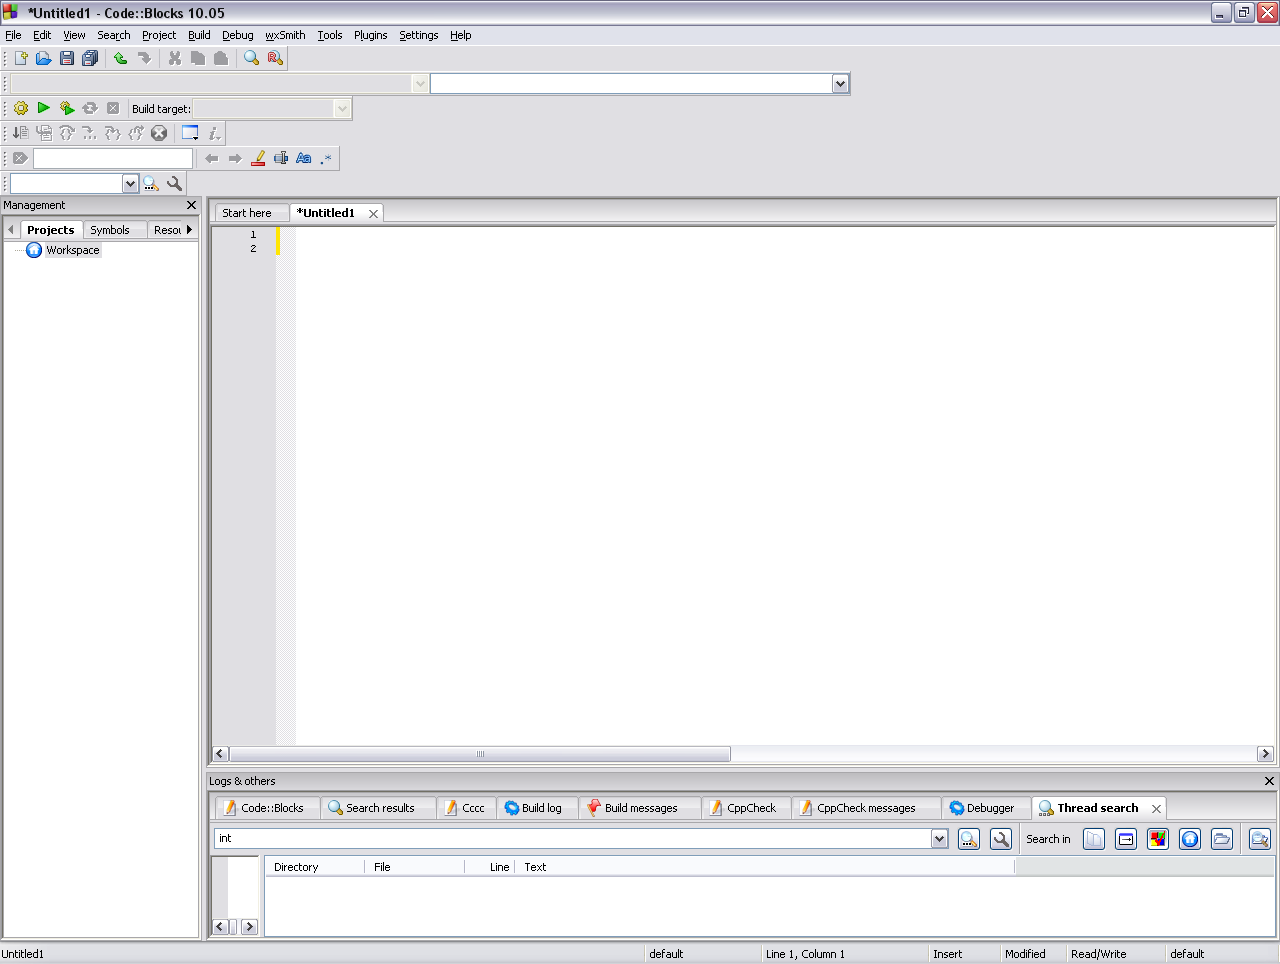
1.9. Elements of the main window
-
Menu strip
-
Menu strip is in to top left corner of the window, right bellow the title
-
There can be found menus
File,Edit,View,Search,Project,Build,Debug,wxSmith,Tools,Plugins,Settings,Help
-
-
Toolstrip
-
Toolstrip (buttons for starting most often used commands) are just bellow the menu strip
-
-
Workspace
-
Text editor
-
Info window for logs & others
-
Window for management
-
2. Programming in C with Code::Blocks
2.1. Creating project
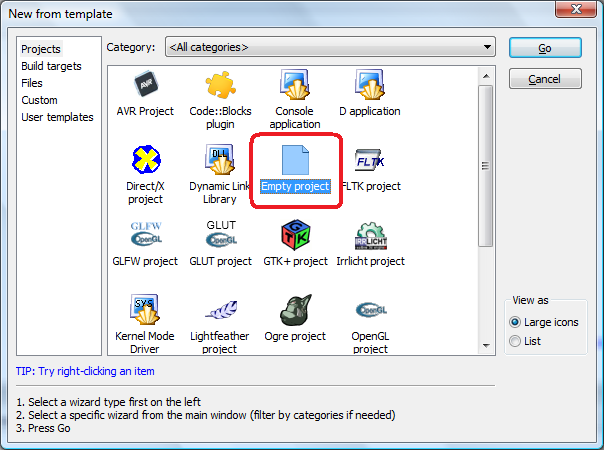
-
Start Code::Blocks
-
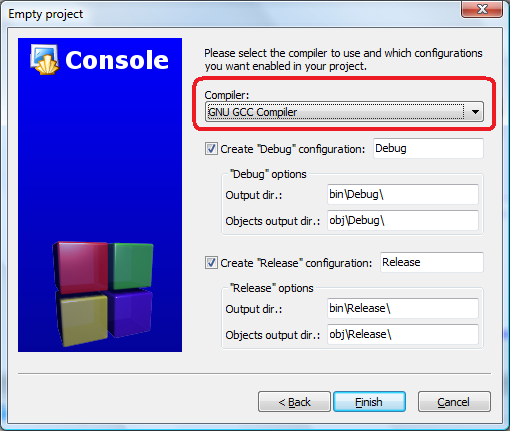
File → New → Project → Empty Project → Go -
Choose
GNU GCC Compiler -
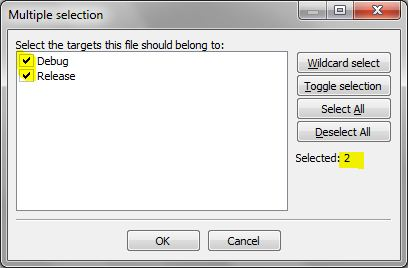
Select the next 2 options if you want to create
debugandreleaseconfiguration
-
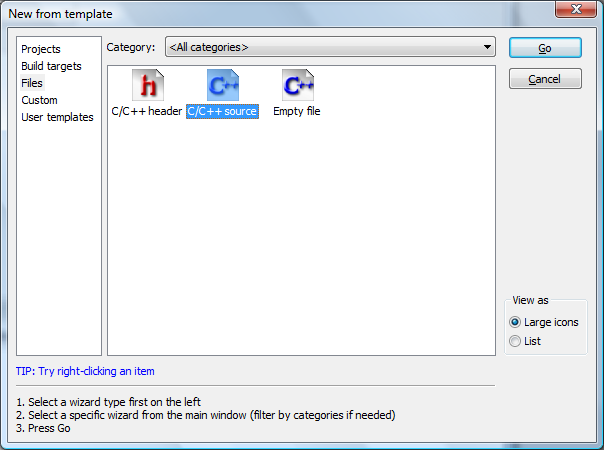
2.2. Adding source file
-
Add source file in the project:
File → New → File → C/C++ Source -
Choose C as programming language
-
Enter the file name with the full path, and don’t forget to check
Add file to active project
2.3. Programming
-
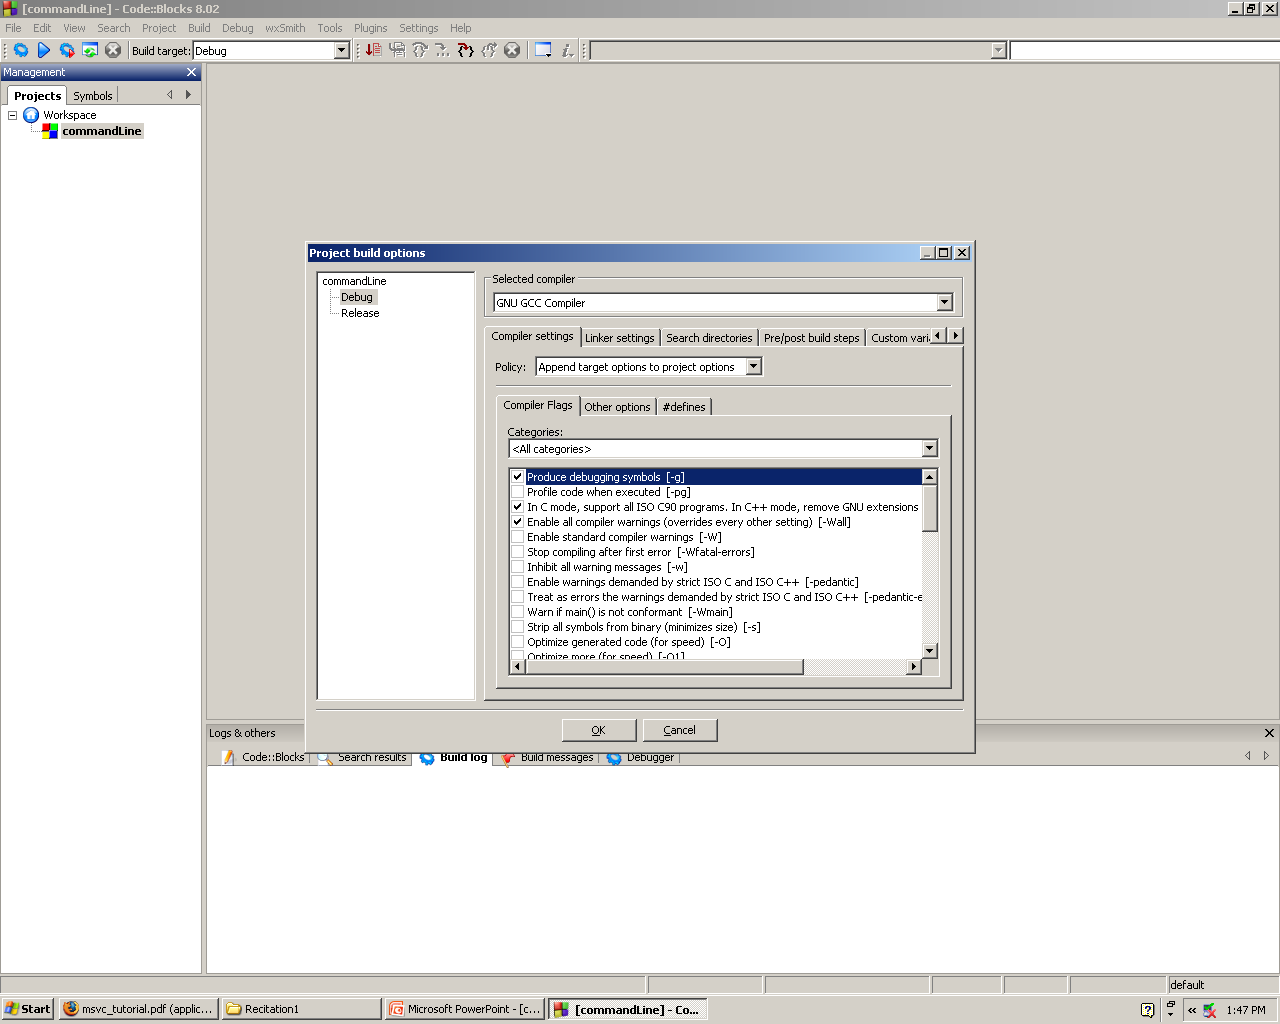
For each project following options can be checked
Project Build Options.. Compiler Flags-
Project Build Options.. -
Compiler Flags
-
-
To build the project press
Ctrl + F9 -
To execute the project press
Ctrl + F10

3. Homework
In the next section are given some example problems that you should try to complete at home, so you can be ready for the next exercises.
3.1. Problem 1
Try to create new project with one .с file with the following source code:
#include <stdio.h>

int main() {
    printf("Hi, how are you?\n");
    return 0;
}-
Execute the program
-
What result do you get?
If you made some errors during writing the code, try to find, correct them and execute again.
Make some errors, intentionally. Execute again!
What’s happening now?
3.2. Problem 2
In the source code add the marked part:
#include <stdio.h>

int main() {
    printf("Hi, how are you doing?\n");
    // add this following line
    printf("So, yo're not in the mood for talking?\n");
    return 0;
}
What is the result of the execution now?